Sign up for Compliance Blog

OSHA Heat Prevention: Requirements and Practical Tips

Kelli Ngariki • July 7, 2023

Under OSHA regulation, employers are responsible for providing workplaces free of known safety and health hazards including protecting workers from heat-related hazards. 

Heat prevention OSHA

Heat stress is a serious condition that can lead to heat exhaustion and heat stroke when the body's internal temperature regulation is compromised. Heat illness symptoms can look like excessive sweating, dizziness, headaches, rapid pulse, and nausea. These signs should never be ignored, they indicate the body's struggle to cope with heat. OSHA (Occupational Safety and Health Administration) recognizes the significance of preventing heat-related illnesses. There are simple steps you can take to develop a Heat Illness Prevention Plan within your office during the warmer seasons.


To prevent heat stress in warmer seasons, whether at work or outdoors, follow these practical tips:


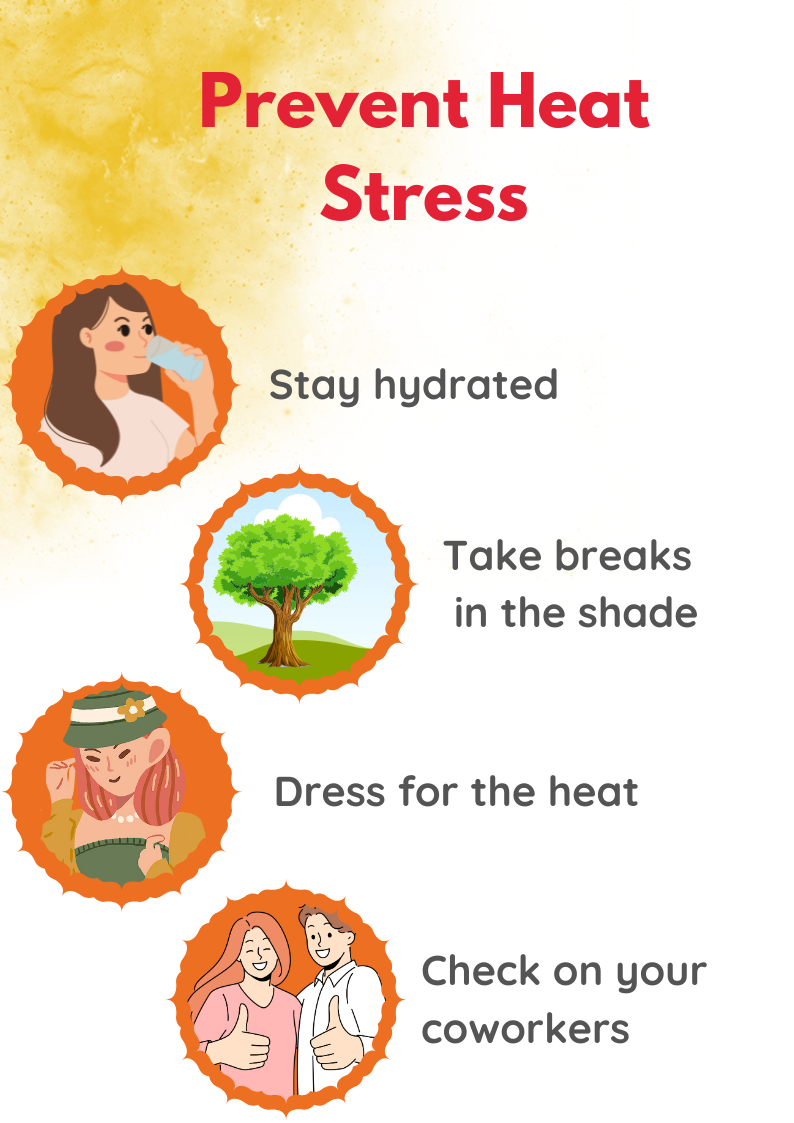
1. Stay hydrated: Hydration is essential for regulating body temperature. Drink water frequently, even if you don't feel thirsty. Proper hydration replenishes lost fluids due to sweating.


2. Take regular breaks in the shade: When the heat becomes overwhelming, take breaks in shaded or air-conditioned spaces. These breaks help prevent overexertion and reduce the risk of heat-related illnesses.


3. Dress for the heat: Opt for lighter, loose-fitting clothing made from breathable materials like cotton. Breathable fabrics facilitate air circulation, evaporation of sweat, and effective temperature regulation.


4. Check on your coworkers: According to OSHA, over 70 percent of heat-related deaths occur during a worker's first week. Existing employees are also at risk when temperatures rise. Ensure you and your coworkers are trained to recognize and respond to heat-related illnesses promptly. If symptoms occur, take appropriate steps such as drinking water, seeking a cool spot, and obtaining medical attention if needed.


NOTE: While wearing a lab jacket is required by OSHA during clinical procedures, it shouldn't be worn outside the clinic area. Opt for short-sleeved clothing to provide relief from heat when not engaged in clinical duties.


Providing OSHA heat prevention training and following practical tips for heat prevention are crucial for maintaining well-being, particularly during warmer seasons. Remember to stay cool, stay hydrated, and stay safe. Prioritize your safety and the safety of your coworkers by recognizing and addressing the risks associated with heat stress.

By Kelli Ngariki April 21, 2026
Transcript Most Oregon dental practices believe they are HIPAA compliant—but there are a few key gaps we consistently see. Here are three worth reviewing: 1. Patient Record Requests Patients have the right to access their records quickly and without unnecessary barriers. If your process is slow or complicated, it’s worth a second look. Delays can lead to frustrated patients, strained referral relationships, and potential complaints. 2. Staff Access to Patient Information Not every team member needs full access to patient data. The more streamlined and limited your access structure is, the lower your overall risk and exposure. 3. Treating HIPAA as a Once-a-Year Checkbox A compliance program that isn’t actively maintained throughout the year isn’t truly a program—it’s just a binder on a shelf. None of these issues are difficult to fix, but they’re easy to overlook when you’re focused on running a busy practice. Taking a few minutes to review them now can help prevent bigger problems later. For more on HIPAA, watch for our next video covering the number one violation dental practices are cited for.
By Kelli Ngariki April 14, 2026
Small dental and healthcare clinics have enough on their plate without worrying about OSHA citations. Beyond avoiding fines, workplace safety is essential for protecting your team and fostering a culture of care, responsibility, and professionalism. Whether you’re new to managing compliance or just need a refresher, here are five key OSHA must-haves for 2025: 1. Bloodborne Pathogens & Sharps Safety Train annually (yes, every year!) on how to handle exposure risks Keep a current Exposure Control Plan Offer the hepatitis B vaccine series and document refusals Ensure every employee with face-to-face patient contact has a documented TB test, as required for healthcare settings 2. Hazard Communication Make sure your team knows where SDS sheets are stored and how to read them Label secondary containers clearly Train new staff on chemical hazards—before their first exposure 3. PPE Use and Fit Gloves, eye protection, masks, gowns: who wears what, and when? Train staff on how to properly don and doff PPE Conduct hazard assessments to justify PPE use 4. Emergency Action Plans Fire evacuation, exit routes, and emergency contacts should be posted and known Conduct brief Emergency Action Plan refreshers annually (many offices forget this!) 5. OSHA Documentation & Inspection Prep Keep training logs, incident reports, and written plans accessible Know what to do if an inspector shows up—who talks to them, what documents to provide Bonus: Don’t Let OSHA Be a Surprise Most OSHA citations in small clinics are for things like: Failure to document regular safety meetings Missing training records No exposure control plan Blocked exits Failing to flush eye wash stations Why OSHA Compliance Matters More Than Ever in 2025 OSHA doesn’t have to be overwhelming. With a little preparation and the right tools, you can create a safe, compliant workplace and avoid costly mistakes. Want help with your OSHA binder, policies, or staff training? Reach out—we make compliance doable for busy healthcare teams. This post was drafted with assistance from AI and reviewed by a compliance professional to ensure accuracy and relevance for healthcare practices.
By Kelli Ngariki March 5, 2026
Learn what patching vulnerabilities means for dental and small healthcare practices, who owns it, how often to patch, and what OCR expects after ransomware.
People receiving HIPAA training; a man points to a screen displaying training information. Laptop open, server room in background.
By Kelli Ngariki February 18, 2026
Many tech companies and vendors don't realize HIPAA applies to them. Learn if you're a Business Associate and what training your workforce needs to avoid fines.
Medical device, white and teal, with a tray and control panel.
By Kelli Ngariki November 24, 2025
In fast-paced dental and medical clinics, it’s tempting to rely on a STATIM sterilizer—a type of immediate-use steam sterilizer—to quickly process instruments. But using this device appropriately is critical to patient safety and regulatory compliance. This post breaks down when and how to use STATIM sterilization based on CDC flash sterilization guidelines, helping small healthcare practices stay compliant without cutting corners. What Is an Immediate-Use Steam Sterilizer (STATIM)? A STATIM sterilizer is a specialized piece of equipment used for immediate-use steam sterilization (IUSS), formerly known as flash sterilization. It’s designed to rapidly sterilize medical and dental instruments that are urgently needed for patient care—not for routine or convenience-based use. When Is It Acceptable to Use a STATIM Sterilizer? According to CDC sterilization standards, STATIM use is acceptable only when: • The instrument is urgently needed and there’s no time to sterilize using standard packaging and storage methods. • It’s not being used to compensate for having too few instrument sets or to save time during busy periods. CDC Guidelines for Flash Sterilization: What You Must Do Following these steps will help you stay compliant with CDC and OSHA infection control requirements: 1. Limit Usage to Urgent Needs Only use STATIM sterilization for instruments needed immediately for patient care. 2. Do Not Use for Convenience Avoid using it as a way to speed up workflow or compensate for inadequate inventory. 3. Thoroughly Clean Instruments First All instruments must be fully cleaned and decontaminated before entering the STATIM cycle. 4. Do NOT Store Unwrapped Items After sterilization, transfer instruments (or handpieces) directly to the point of use in a sterile container or tray. Never store unwrapped items. 5. Use Approved Containers Only Only use flash sterilization containers or trays designed for high-temperature steam. 6. Monitor All Sterilization Cycles • Use biological indicators at least weekly. • Use chemical and mechanical indicators in every STATIM cycle. 7. Prevent Contamination During Transfer Maintain a clean transfer process. Ensure that items aren’t contaminated during handling or transport. Best Practices for STATIM Sterilizer Use in Dental and Medical Clinics • Keep backup instrument sets available to reduce reliance on immediate-use cycles. • Ensure staff are trained on STATIM operation and CDC sterilization protocols. • Document and log every STATIM cycle, including indicator results. • If your clinic is frequently using the STATIM for convenience or to keep up with patient flow, consider investing in an additional autoclave to support proper instrument processing and reduce compliance risks. Learn More from the CDC For detailed guidance on sterilization in healthcare settings, visit the CDC’s official page: 🔗 CDC Sterilization Guidelines Strong infection control isn’t just about guidelines— it’s about how your dental practice operates day to day. The way instruments are handled, PPE is used, and procedures are carried out in the clinical space affects both infection control and OSHA compliance. Issues in these areas are often identified during OSHA inspections, exposure incidents, or infection control reviews. Our FREE OSHA Compliance Risk Review helps dental practices understand how their safety and infection control efforts are functioning by identifying: Workflow or physical-space issues that may increase exposure risk OSHA gaps related to PPE, training, or exposure controls Areas where OSHA and CDC infection control expectations overlap It’s a simple, no-obligation way to confirm whether your safety systems support both staff protection and patient care. 👉 Schedule Your Free OSHA Compliance Risk Review
Dental drill bits in a holder, with a dental mold in the background.
By Kelli Ngariki November 18, 2025
If you've ever wondered about the right way to clean and sterilize dental burs, you're not alone. The CDC gives general guidance for sterilizing dental instruments, but doesn’t get into bur-specific details. Regardless of which autoclave you use, the process for burs remains largely the same. Here's how to do it right. The CDC's Take: General Guidelines The Centers for Disease Control and Prevention (CDC) classifies burs as critical or semi-critical instruments, depending on how they’re used. That means they need to be heat sterilized. But before you toss them in the autoclave, they need to be properly cleaned and packaged. Step-by-Step: Best Practices for Burs Here’s how to apply infection control principles in your practice: 1. Identify Your Burs Single-use or Reusable? Check manufacturer instructions. If there are no validated reprocessing instructions, consider the bur single-use and toss it after one use. 2. Pre-clean and Inspect Remove debris immediately after use. Use an ultrasonic cleaner or manually scrub with a detergent or enzymatic solution. Rinse and dry completely. Inspect for damage or wear. If damage, wear, or corrosion: Remove the bur from use (even if minor damage) Discard it in the sharps container For quality control and tracking, consider documenting the discard and the reason. Never try to repair or reuse. 3. Packaging for Autoclaving Best Practice: Use a Bur Holder or Cassette Place burs in a bur block, bur guard, or instrument cassette designed for sterilization. Choose holders that are autoclave-safe (heat-resistant and able to withstand moisture). Then wrap or pouch the holder itself—not the loose burs. Bonus Tip: Some bur blocks come with color-coded or numbered slots so you can standardize bur sets per procedure. If you're using a pouch: make sure the bur holder fits comfortably and the pouch is sealed with chemical indicators inside. Use sterilization pouches or wraps approved for steam sterilization. For small batches, individual pouches work fine. Larger loads can go in wrapped cassettes. Seal all packaging properly and include internal and external chemical indicators. 4. Load Placement in the Autoclave Place pouches paper side up (or follow your pouch manufacturer’s instructions). Don’t overcrowd the trays. Allow space between items. Do not let pouches or cassettes touch the chamber walls. Cassettes should be placed horizontally unless your autoclave manual says otherwise. 5. Choose the Right Cycle Pick the cycle that matches your packaging: "Pouches," "Wrapped Cassettes," or similar. Make sure to allow full drying time to prevent moisture-related contamination. 6. Post-Sterilization Handling Let packs cool and dry fully before handling. Store in a clean, dry area away from sinks or contamination zones. Reprocess any items in compromised packaging. A Note on Sterility and Performance Burs are small and intricate, making them tricky to clean. Over time, reusing them can reduce cutting efficiency and increase the risk of breakage. Keep track of how often burs are reused and inspect regularly. Documentation Matters Make sure your infection control manual includes: Bur inventory (type and classification) Manufacturer instructions for cleaning and sterilization Step-by-step packaging and sterilization protocol Inspection and discard criteria Final Thoughts Using your autoclave the right way means following a solid protocol: proper cleaning, smart packaging, and correct cycle selection. When in doubt, refer to the bur manufacturer's IFU and document everything. Ready to Step Up Your Compliance Game? Book a Compliance Risk Review with us today. We'll evaluate your sterilization protocols, OSHA readiness, HIPAA safeguards, and infection control practices to make sure your office is fully protected and audit-ready. Don’t wait for an inspector to find the gaps—let’s fix them now. Call Lindsay at 541-345-3875 ext. 3 .
why-bleach-should-never-be-used-in-dental-unit-waterlines-blog
By Kelli Ngariki November 3, 2025
The Temptation: “Bleach Kills Everything… Right?” When biofilm builds up in dental waterlines, it’s tempting to grab that familiar bottle of bleach and think, “This will take care of it.” But here’s the truth: while bleach does kill bacteria, it can also damage your equipment, corrode your lines, and void your warranties—all while failing to meet the requirements set by the CDC and EPA for dental unit waterline treatment. The Science: Why Bleach Fails the DUWL Test Dental waterlines are delicate systems that require a balance of disinfection, safety, and equipment compatibility. Here’s why bleach (sodium hypochlorite) doesn’t belong anywhere near them: Not EPA-Registered for DUWLs: The EPA maintains a list of antimicrobial products approved for dental unit waterline use. Bleach isn’t on it. Using an unregistered product puts your practice out of compliance and at risk during inspections. Corrosive to Dental Equipment: Bleach corrodes metal fittings, valves, and plastic tubing, leading to leaks and costly repairs. It also degrades O-rings and adhesives inside the dental unit—issues that can cause long-term system failure. Doesn’t Rinse Cleanly: Bleach leaves chemical residues that are difficult to flush completely, creating a potential safety hazard for both patients and staff. No Validated Instructions for Use (IFUs): Without IFUs for dilution or contact time, there’s no safe way to know how much bleach (if any) could be used without harming your unit—or your patients. The Safer, Smarter Way to Shock and Maintain Your DUWLs To eliminate biofilm safely, choose EPA-registered products that are specifically formulated for dental waterlines and validated by equipment manufacturers. Common and trusted options include: Hydrogen peroxide–based systems (e.g., ProEdge Liquid Ultra, Sterilex Ultra, Mint-A-Kleen) Silver-ion systems (continuous maintenance tablets) Iodine or peracetic acid formulations These products are tested for: Compatibility with dental materials Safety for patients and staff Proven effectiveness against biofilm Real-World Lessons: Quick Fixes = Costly Problems One hygienist shared her experience: “We tried diluted bleach as a quick shock because we were low on supplies. Two weeks later, we failed our waterline test—and had to reschedule four patients.” Shortcuts might seem efficient, but they often result in failed water tests, system repairs, and frustrated patients. Best Practices for Dental Waterline Compliance Follow the manufacturer’s instructions for use (IFU) for your dental unit and treatment product. Perform a shock treatment as recommended (typically quarterly or after test failures). Use a continuous treatment product between shocks. Test monthly or per IFU, or state and CDC guidance to ensure ≤ 500 CFU/mL. Key Takeaway Bleach belongs in your laundry room, not in your dental unit waterlines. By using approved products and consistent testing, your practice can stay safe, compliant, and confident—without risking costly equipment damage or failed inspections. Want Help Simplifying Your DUWL Protocols? At Healthcare Compliance Associates, we help dental teams across Oregon develop waterline maintenance programs that pass testing the first time—every time. 👉 Contact us today to schedule a compliance consultation or waterline protocol review. 541-345-3875 📞 www.oshahipaatraining.com
Finger with a drop of blood and a syringe, likely for blood sampling or injection, on a white background.
By Kelli Ngariki October 30, 2025
Needlestick or sharps injury at work? Learn when and why you're required to file a workers’ comp claim — and how it ties into OSHA compliance.
preventing-workplace-violence-in-healthcare-a-proactive-compliance-strategy-blog
By Ayana Guzzino October 20, 2025
Workplace violence is an unfortunate but real risk in today’s healthcare environment. Whether it's verbal abuse from a frustrated patient or a physical altercation in a high-stress setting, violence in the workplace threatens not only employee safety but also patient care quality, operational stability, and legal compliance. For healthcare practices, taking a proactive and compliant approach to workplace violence prevention isn’t just good policy—it’s a regulatory and ethical imperative. Why Workplace Violence Prevention Matters in Healthcare Healthcare professionals face a higher risk of workplace violence than employees in many other industries. Factors like long wait times, emotionally charged environments, behavioral health challenges, and open-access facilities all contribute to this vulnerability. Proactively addressing these risks protects staff, reassures patients, and demonstrates a practice's commitment to safety and compliance. 5 Core Objectives for a Violence Prevention Program To build an effective workplace violence prevention strategy, your practice should implement the following foundational elements: Adopt a Written Zero-Tolerance Policy - Establish a formal, practice-wide policy stating that physical and verbal violence will not be tolerated—from anyone, including patients, staff, and visitors. Educate and Train Employees Regularly - Ongoing training empowers staff with tools to de-escalate situations, identify red flags, and respond appropriately in high-risk scenarios. Promote Incident Reporting and Risk Mitigation - Create a culture of openness where staff feel comfortable reporting concerns or incidents without fear of retaliation. Ensure Retaliation-Free Reporting - Clearly state that no employee will suffer negative consequences for reporting violence or unsafe conditions. Implement a Clear Security Policy - Define responsibilities, procedures, and enforcement protocols to manage potential threats effectively. Leadership Commitment is Essential Leadership sets the tone. Management must be fully invested in fostering a safe environment for staff, patients, and visitors alike. This includes allocating resources, enforcing policies consistently, and modeling the expected standards of conduct. Conducting a Workplace Violence Risk Assessment Understanding your unique vulnerabilities is key. An assessment should evaluate: Unrestricted public access Long patient wait times Presence of individuals under the influence Isolated or poorly lit workspaces Remote or understaffed locations History of past incidents This risk evaluation helps tailor your prevention strategies to the actual threats your practice faces. Implementing Effective Controls Workplace violence prevention involves both engineering controls (physical modifications) and administrative controls (policy and procedural improvements). Engineering Controls: Install panic buttons or silent alarms Hire security personnel during peak times Monitor secondary entrances Improve parking lot and exterior lighting Administrative & Work Practice Controls: Maintain clean, calm, and well-organized waiting areas Communicate your zero-tolerance policy to all stakeholders Document all incidents in an on-site Incident File Train staff in conflict de-escalation and response protocols Implement a buddy system for walking to parking areas Dismiss patients or staff who pose repeated threats Call law enforcement when needed Educating Patients and Preventing Escalation Managing patient expectations can reduce tension. Clearly communicate estimated wait times, behavioral expectations, and escalation procedures. Staff should be trained to remain calm, neutral, and professional in all interactions—especially under stress. Encouraging Immediate and Detailed Reporting Timely reporting of threats or incidents—whether physical or verbal—is vital. Employees should report any concerns to their supervisor or the designated Safety Coordinator immediately. Each report helps identify systemic risks and informs necessary changes. Use OSHA-compliant tools like the Violence Incident Report Form to maintain accurate records and document your compliance efforts. Resources and Further Learning Workplace Violence: Can It Happen Where You Work? Patient Dismissal Final Thought A proactive workplace violence prevention plan protects your team, meets OSHA expectations, and fosters a culture of safety and respect. If your practice is ready to take the next step in strengthening your compliance program, Healthcare Compliance Associates is here to help. We offer tailored support, training, and policy development to ensure your team feels secure and your practice stays compliant. Contact us today to learn how we can partner with your practice to build a safer, more compliant workplace.
osha-safety-meetings-why-they-must-focus-on-employees-blog
By Ayana Guzzino September 23, 2025
In healthcare, safety is a wide umbrella. Offices often hold meetings about patient safety, covering topics such as infection control, secure handling of medical records, or protecting patients from hazards. While these conversations are essential for high-quality care, they are not what OSHA means when it requires safety meetings. OSHA’s concern is the safety and health of employees. The law is designed to protect workers from occupational hazards—everything from bloodborne pathogens and needlestick injuries to chemical exposure, fire hazards, and ergonomic risks. Safety meetings, as OSHA defines them, must center on the risks your employees face while doing their jobs. Not sure where your compliance program really stands? You don’t need to have everything figured out—that’s what we’re here for. Our FREE OSHA Compliance Risk Review gives you: A clear look at your current OSHA compliance status Insight into gaps that often affect HIPAA and infection control too A customized summary and next-step recommendations Think of it as a compliance “check-in” that helps you move forward with confidence—without pressure or obligation. 👉 Book Your Free OSHA Compliance Risk Review